5分钟搭建博客系列

本文最后更新于 2022年9月8日 下午

写在前面

本文是作者目前已知的所有静态博客框架的合集,您可以自行查询想要使用的框架。

这里似乎有所有静态博客生成器,现阶段准备写 \(\text{Star}>2k\) 的框架(不一定按顺序)

下面介绍的都是一些基本操作,进阶内容详见--->🕊️

正因如此,介绍过程相对比较简略,仅会描述入门级的内容。当然在不久的将来可能会单独写几篇详细介绍的文章,主要针对人气较高的生成器(似乎都已经写完了诶(❁´◡`❁))

如果这里没有您想要了解的,欢迎在评论区留言~~

文章有些长,建议跳读💣🤢

准备工作

  • Git环境和GitHub账号
  • 终端

注意事项

  • 如有报错,请检查代理是否开启、包管理器版本是否符合要求等,如仍有问题,建议多尝试几次。当然错误原因都是英语,看不懂可以BDFS一下QwQ。

  • 下文中,若无特殊说明,则需在Repo--Settings--Pages中选择从主分支的根目录部署。待GitHub Actions跑完后就可以看到站点(<YOURNAME>.github.io/<PROJECT_NAME>)。


水沝㴇淼渁㵘正式开始

MkDocs(Material主题)

Material for MkDocsMkDocs 的主题,是一个面向(技术)项目文档的静态站点生成器。

🎗️开始

配置环境

安装Python

安装Material for MkDocs

1
$ pip install mkdocs-material

🎍创建站点

初始化

完成安装后,转到您希望项目所在的目录,输入:

1
$ mkdocs new .

生成的文件如下

1
2
3
4
.
├─ docs/
│ └─ index.md
└─ mkdocs.yml

设置主题

mkdocs.yml中添加下面几行

1
2
theme:
name: material

高级配置

咕咕咕

本地预览

输入

1
$ mkdocs serve 

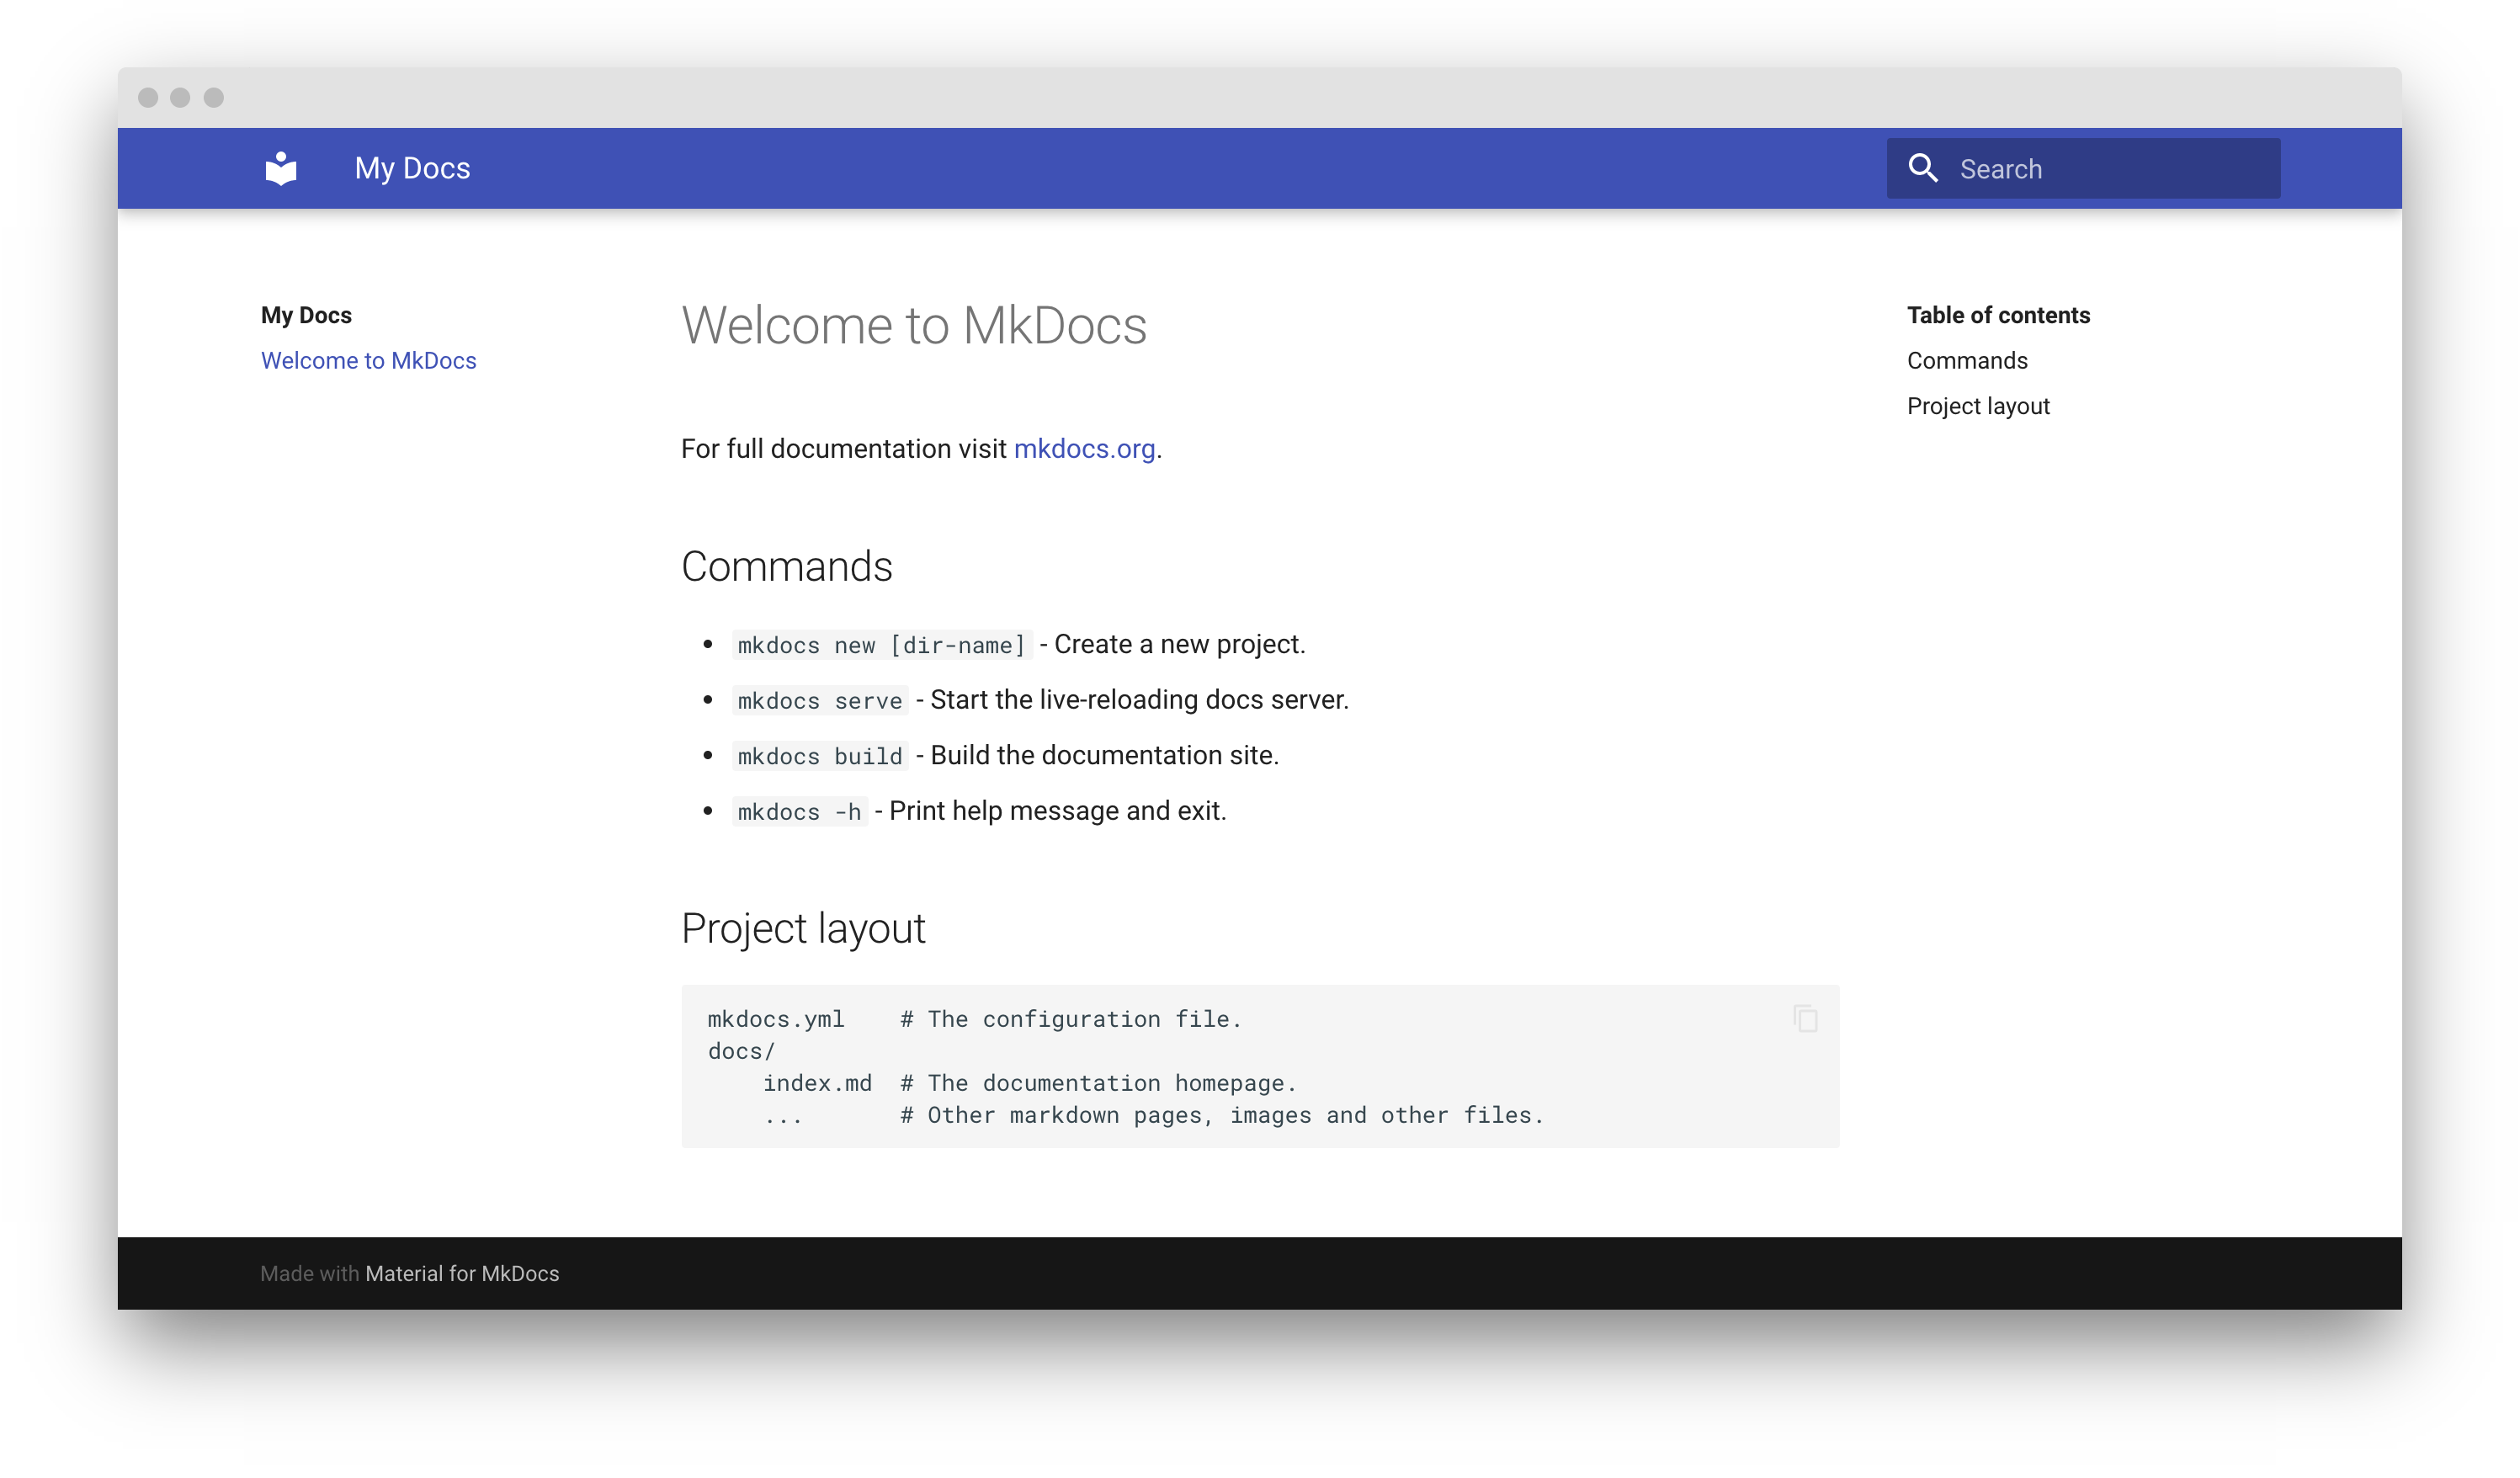
后打开http://localhost:8000/就会看到下图所示界面

MkDocs预览

生成静态文件

1
$ mkdocs build

🪄写作

/docs目录下创建Markdown文档即可

例如目录结构如下

1
2
3
4
5
6
7
.
├─ docs/
│ ├─ foo/
| | ├─ bar.md
| | └─ index.md
│ └─ index.md
└─ mkdocs.yml

则URL为

1
2
3
docs/index.md        => http://domain.com
docs/foo/bar.md => http://domain.com/foo/bar/
docs/foo/index.md => http://domain.com/foo/

🏹部署

添加远程库并执行自带的部署命令

1
2
3
$ git init
$ git remote add origin https://github.com/<YOURNMAE>/<PROJECT_NAME>.git
$ mkdocs gh-deploy

🎉

Docsify

docsify 可以快速帮你生成文档网站。不同于 GitBook、Hexo 的地方是它不会生成静态的 .html 文件,所有转换工作都是在运行时。如果你想要开始使用它,只需要创建一个 index.html 就可以开始编写文档并直接部署在 GitHub Pages。

🛝开始

配置环境

安装Node.js

安装docsify-cli 工具

1
$ npm i docsify-cli -g

🏐创建站点

初始化

执行

1
$ docsify init ./docs

即可在./docs目录下创建站点

本地预览

1
$ docsify serve docs

http://localhost:3000 查看效果

个性化

参见官方文档🕊️

💡写作

直接写Markdown文件

📸部署

经典操作

1
2
3
4
5
$ git init
$ git add .
$ git commit -m '<COMMIT_MESSAGE>'
$ git remote add origin https://github.com/<YOURNAME>/<PROJECT_NAME>.git
$ git push -u origin main

🎉

Hugo

参见此文

Jekyll

Jekyll is a static site generator. It takes text written in your favorite markup language and uses layouts to create a static website. You can tweak the site’s look and feel, URLs, the data displayed on the page, and more.

(懒得翻译)

🔖开始

配置环境

安装Ruby,下载时选择Ruby+Devkit的版本

安装后会执行一个脚本,开始选择MSYS2 and MINGW development tool chain[3]之后一路Yes即可(似乎也没有那么多)

安装Jekyll

1
$ gem install jekyll bundler

初始化

1
$ jekyll new myblog

上述过程可能会很慢,要有耐心哦~

🍭创建站点

此时我们已经有了一个空白的站点,不妨执行

1
$ jekyll serve

以在http://localhost:4000/查看效果

接下来可以参照官方文档进行操作,或通过BDFS参考一些进阶方法

原因是要写JS(逃

🖊️写作

JS+Markdown那就🕊️了吧

🎸部署

经典操作++

需要注意的是,如果你的个性链接是以/myblog之类结尾,需要更改_config.yml中的baseurl

🎉

Docusaurus

好慢啊(bushi

文档

🥪安装

疯狂跑命令

1
2
3
$ npx create-docusaurus@latest my-website classic
$ cd my-website
$ npm run start

🧹写作

MarkDown即可

✈️部署

更改docusaurus.config.js,设置域名、子域、仓库所有者、仓库名……

Git Bash执行

1
$ GIT_USER=<YOURNAME> yarn deploy

跑一下就好了

🎉

Hexo

参见此文

Docute

方便至极

官方文档

🎲开始

在工作目录下新建一个index.html,写入以下内容

1
2
3
4
5
6
7
8
9
10
11
12
13
14
15
16
17
18
<!DOCTYPE html>
<html>
<head>
<meta charset="utf-8">
<meta name="viewport" content="width=device-width, initial-scale=1, shrink-to-fit=no">
<title>My Docs</title>
<link rel="stylesheet" href="https://unpkg.com/docute@4/dist/docute.css">
</head>
<body>
<div id="docute"></div>
<script src="https://unpkg.com/docute@4/dist/docute.js"></script>
<script>
new Docute({
target: '#docute'
})
</script>
</body>
</html>

接着新建一个README.md文件,作为网站首页

🧩写作

So easy!

不就是Markdown吗

🍡部署

经典操作+10086

1
2
3
4
5
$ git init
$ git add .
$ git commit -m 'init'
$ git remote add origin https://github.com/<YOURNAME>/<PROJECT_NAME>.git
$ git push -u origin main

🎉

VuePress

参见此文

Astro

快极了

官方文档(有中文诶!好评)

⏱️开始

初始化
1
$ yarn create astro

按情况选择安装内容

预览
1
$ yarn start

📌写作

src/pages中写.astro.md文档均可

🍄部署

经典操作一条龙服务,然后在Pages设置中选择从Workflow部署

接着选择自行创建,在网页编辑器中写入下面内容

1
2
3
4
5
6
7
8
9
10
11
12
13
14
15
16
17
18
19
20
21
22
23
24
25
26
27
28
29
30
31
32
33
34
35
name: Github Pages Astro CI

on:
# Trigger the workflow every time you push to the `main` branch
# Using a different branch name? Replace `main` with your branch’s name
push:
branches: [ main ]
# Allows you to run this workflow manually from the Actions tab on GitHub.
workflow_dispatch:

# Allow this job to clone the repo and create a page deployment
permissions:
contents: read
pages: write
id-token: write

jobs:
build:
runs-on: ubuntu-latest
steps:
- name: Checkout your repository using git
uses: actions/checkout@v2
- name: Install, build, and upload your site
uses: withastro/action@v0

deploy:
needs: build
runs-on: ubuntu-latest
environment:
name: github-pages
url: ${{ steps.deployment.outputs.page_url }}
steps:
- name: Deploy to GitHub Pages
id: deployment
uses: actions/deploy-pages@v1

并命名为deploy.yml

之后会自动触发部署

当然,我们改变了仓库内容,下次在本地修改前需要先执行

1
$ git pull https://github.com/<YOURNAME>/<PROJECT_NAME>.git

push

🎉

Gridea

有GUI啊,那没事了

🍀开始

安装Gridea

配置GitHub用户和仓库信息,点击左下角的检测远程连接,确认无误后点击同步即可

注:请关闭代理

🌈写作

软件内置了Markdown编辑器,直接写作即可

🛶部署

同步=部署

🎉

Pelican

官方文档

🛞安装

1
2
$ python -m pip install "pelican[markdown]"
$ pelican-quickstart

按需初始化

💾写作

Markdown!好事!

1
2
$ pelican content
$ pelican --listen

执行上述命令进行预览

📠部署

进入output文件夹,执行经典操作

阿巴阿巴阿巴阿巴

🎉

mdBook

看着不错

☄️安装

安装Rust

英语都能看懂是吧

注意 如果不想安装Visual Studio,可以在安装后执行

1
2
$ rustup toolchain install stable-x86_64-pc-windows-gnu
$ rustup default stable-x86_64-pc-windows-gnu

安装mdBook

1
$ cargo install mdbook

需要漫长的等待

☃️写作

1
$ mdbook init my-first-book

src目录下写Markdown即可

具体格式参阅官方文档

通过

1
$ mdbook serve --open

进行本地预览

1
$ mdbook build

构建静态文件

🌸部署

book目录下执行经典操作

🎉

VitePress

官方文档

📩安装

1
2
$ yarn init 
$ yarn add --dev vitepress vue

packages.json中加入以下内容

1
2
3
4
5
6
7
8
9
{
...
"scripts": {
"docs:dev": "vitepress dev docs",
"docs:build": "vitepress build docs",
"docs:serve": "vitepress serve docs"
},
...
}

🖋️写作

./docs中写Markdown

1
2
$ yarn docs:dev #本地预览
$ yarn docs:build #生成静态文件

🎬部署

检查base设置(仓库名非<YOURNMAE>.github.io

1
2
3
4
5
6
// docs/.vuepress/config.js
export default {
title: 'VitePress',
description: 'Just playing around.',
base: '/<REPO_NAME>/' //Optional
}

新建工作流(.github/workflows/deploy.yml

1
2
3
4
5
6
7
8
9
10
11
12
13
14
15
16
17
18
19
20
21
22
23
24
25
26
name: Deploy

on:
push:
branches:
- main

jobs:
deploy:
runs-on: ubuntu-latest
steps:
- uses: actions/checkout@v2
- uses: actions/setup-node@v3
with:
node-version: 16
cache: yarn
- run: yarn install --frozen-lockfile

- name: Build
run: yarn docs:build

- name: Deploy
uses: peaceiris/actions-gh-pages@v3
with:
github_token: ${{ secrets.GITHUB_TOKEN }}
publish_dir: docs/.vitepress/dist

检查有无错误(yarn docs:build

经典操作+998244353

🎉

Publii

GUI!

大致操作同Gridea,但是英文界面

官方文档🎉

Sphinx

安装

1
2
3
$ python -m venv .venv
$ .venv/scripts/activate
(.venv)$ python -m pip install sphinx

初始化

1
(.venv)$ sphinx-quickstart docs

写作

./docs/source下写rst文档,似乎是Markdown的奇怪版本,语法参考

部署


5分钟搭建博客系列
https://qwerx29.github.io/posts/18551a9f.html
发布于
2022年8月10日
更新于
2022年9月8日
许可协议